Key Takeaways
The best tips for taking rental photos are:
- Light up your rental
- Watch your reflection
- Take photos at the right height
- Get a good angle
- Position yourself in the best spot
- Keep everything straight
- Consider using a tripod
- Shoot a video
- Add a 3D tour
First impressions are everything, especially when renters are searching for their new home online. Excellent property photos will not only make your listing stand out, but will also help you attract more renters.
Tips and Tricks for Taking Rental Photos
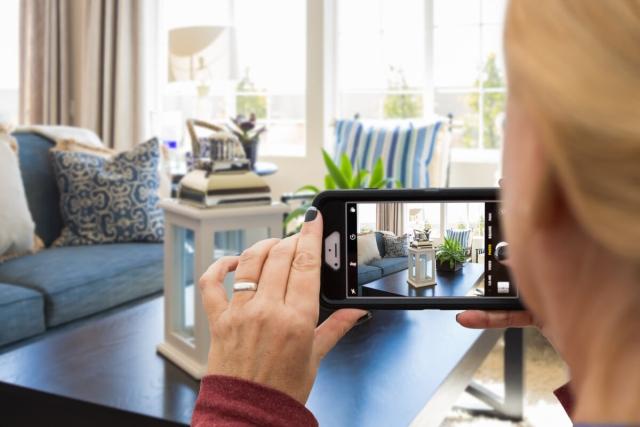
You don’t need to hire a professional photographer to take amazing photos of your rental. With just a phone or camera and the right tips and tricks, you can capture great shots of your rental.
Light up your rental
Lighting can dramatically impact the feel of a photo. While photographing your rental property, take advantage of natural light as it helps spaces look bright, natural, and inviting. However, too much sunlight can lead to an overblown shot that washes out your photo. Use blinds and curtains to shape light to get the best shot.
Make sure you turn on light fixtures. People expect these to be on in photos, and it creates a more welcoming and lived-in atmosphere. Light fixtures fill in any gaps left by the natural light. Turning on lights is also important in darker areas like bathrooms and closets.
Avoid flashes because even though they light things up, they can cause a whole host of issues, including artificial spots and bad glares. Architectural photographer Christiaan Cruz says, “Keep the flash off. That’s probably going to reflect on things and make it look too fake.” The bright, white color of the flash can make places seem sterile and unwelcoming or even clash with the light from the fixtures.
Watch your reflection
Your rental is the star of the show, so anything that distracts from your property hurts your listing. An unwanted visitor that can sneak into photos is your reflection, whether it’s in mirrors or windows.
“When you are shooting that bathroom, make sure you’re not showing up in the reflection of the mirror. If you have to, open the medicine cabinet or move it a little bit so it doesn’t reflect back at you. Even in windows you can see yourself so just be aware of yourself appearing in photos,” Cruz said.
Take photos at the right height
The position of where you take a photo dramatically influences a shot. Avoid weird, angled distortions by shooting wide shots at waist level or right above countertop height. Cruz notes that aiming the camera too high or too low can lead to converging lines or a distorted image. You want the photo to look flat, similar to how a picture looks in a picture frame.
Get the right angle
For those with cameras, you can get a wide-angle lens, but make sure it isn’t so wide that it gives the photo a fish-eye effect. This messes up and distorts the photo. Don’t worry if you don’t have a camera. Many smartphones include a 0.5x lens that can get shots of the entire room.
Position yourself correctly
Positioning yourself in the right spot in the room is also key to a good photo. Put yourself in the corner of the room so that you can get shots of the entire room as well as any entrances, exits, or hallways. Renters want to be able to see the entire room and how the room connects and flows into the rest of the apartment. If corners are out of the question, taking photos in the doorway lets you get as much of the room as possible.
Keep everything straight
Tilted and crooked photos feel off and that is the last impression you want to give to potential renters. The grid feature on cameras and phones is vital in helping you take straight photos. Make the vertical lines of the wall parallel with the vertical lines of the grid.
Consider using a tripod
Taking a photo can be a sensitive task, and even a slight tremor in your hands or arms can lead to blurry images. Regardless if you are using a phone or camera, a tripod can help achieve clear, crisp, and consistent photos. Tripods are especially helpful in low light areas where the camera needs to be completely still as you take a long-exposure shot.
Cruz recommends to always use a tripod when shooting interiors with a digital camera. “When you’re shooting a still subject, you want to be stiff, firm, and solid, you don’t want your arms free,” Cruz noted. Or if you’re using a smartphone, brace your elbows against your torso and stand straight and firm.
Shoot a video
Video has become a major player in the world of marketing, and it can help strengthen your rental listing as well. Renters appreciate how videos show off the flow and layout of the rental, as photos can struggle with this task.
You don’t necessarily need an expensive camera to get quality video, either. Smartphones are more than sufficient to capture a great video of your rental. A video tour can help your rental listing stand out and attract more potential renters.
Add a 3D tour
While 3D tours may seem complicated and high-tech, they are actually easy to add to your listing as you can create them with your phone. Recording a 3D tour as you take photos is best since many of the tips for photographing a rental carry over to capturing a virtual tour.
Enjoy the many benefits of 3D tours today by upgrading to a Premium listing on Apartments.com. You’ll attract more renters, increase engagement with your listing, widen your applicant pool, and much more with Matterport 3D tours.
How to Prepare for Rental Photos
To get amazing photos that capture renter’s interest, you first need to prepare.
Stage the room
Before you even start taking any photos, consider staging your rental because you want potential tenants to envision themselves living there. Staging rooms with furniture, light fixtures, and décor paint a picture of what it might be like to live in the space.
Remember, the goal of staging is to help the renter imagine themselves living in your rental. So don’t go too wild with bold accents and statement pieces; try to keep it neutral and simple.
Showcase the community
If the rental is located within a trendy neighborhood or you offer luxury amenities, highlight them in your property photos. Many landlords post pictures of common areas like the leasing office, swimming pool, or courtyard, so consider photographing relevant destinations or attractions in your area.
For example, Cruz explains that if your rental is in a downtown neighborhood or is a storefront property, it might help to have a photo to illustrate that. Other examples include capturing a popular local restaurant or park that is within walking distance. If you want to go the extra mile, you can use a drone to capture photos from a bird’s eye view. “If you know what you’re doing and how to do it safely, go ahead and use the drone,” Cruz said.
Interior photos are vital
Of course, capturing the exterior and surrounding community is important, but interior photos play the primary role. Renters are mainly focused on the space they’ll be living in and want to see every nook and cranny of the interior in detailed photos.
Make sure to photograph the kitchen, bedrooms, bathrooms, and living spaces as well as any unique amenities. Try different heights, angles, and positions so that you have a wide variety of images to choose from. Snap several photos each time, in case one is blurry or crooked.
Wrap it up with exterior photos
Though interior photos should be the highlight of your listing, don’t forget about photos of the outside of your rental as the exterior is important context. It gives a sense of the neighborhood and what surrounds the rental. Outdoor amenities, including porches, patios, pools, and garages, should also be photographed so renters know what comes with the rental.
This article was originally published on May 12, 2020.
FAQ
What is the best time of day to take rental photos?
The best time of day to take rental photos is during late morning or early afternoon when the natural light is bright but not overly blinding. For exterior photos, aim for the “golden hour,” just after sunrise or right before sunset, to get stunning shots.
Watch the surroundings of your rental because they can cast unwieldy shadows that can make pictures look bad. If there are lots of trees or hedges that cast huge shadows over your rental near sunset, then you might want to try sunrise, so the shadows are facing the other direction.
How do I get bright photos?
To get well-lit photos, make sure there is plenty of natural light and all light fixtures are turned on. In dark spaces, you may need to increase exposure for cameras or turn on night mode for phones to get brighter pictures.


